Category Archives: Shared Articles

Whitespace for dummies.


Safe haven for drivers

Whitespace for dummies.

You see a parking sign like this every day as well as many other street signs. You probably do not even look at them with care, you just glance over them and you instantly know what they represent.


The design question that comes to mind: why is there so much unused space around the letter P? There are thousands of such signs around in your city, and they cost hefty money to make. Why bother with such a huge space around letter P that is not occupied with information? Why not cut down this sign to the border of letter P, and save lots of material, therefore save money?

Why not have economic Parking sign?

The construct

This Parking sign is actually a construct of two major elements which when combined form a single piece conveying information.

  1. Letter P in the center,
  2. Lots of whitespace surrounding it.

The whitespace surrounding central piece of information is here to make sure this entire construct conveys the information. If you remove whitespace, the central information will blend with the background or other objects. In this case, if there was a white building in the background or a cloudy sky — the main information would be choked.

Whitespace is not some designery gimmick. It is not a trend in design. Whitespace is integral part of a construct helping the central piece to communicate a message.Removing whitespace corrodes the construct’s ability to work.

Love your whitespace.

This entry passed through the Full-Text RSS service - if this is your content and you're reading it on someone else's site, please read the FAQ at fivefilters.org/content-only/faq.php#publishers.

گریه ی شبانه

شعر بی نظیر گریه شبانه از استاد هوشنگ ابتهاج، امیدوارم لذت ببرید.


شب آمد و دل تنگم هوای خانه گرفت

دوباره گریه ی بی طاقتم بهانه گرفت


شکیب درد خموشانه ام دوباره شکست

دوباره خرمن خاکسترم زبانه گرفت 


نشاط زمزمه زاری شد و به شعر نشست

صدای خنده فغان گشت و در ترانه گرفت


زهی پسند کماندار فتنه کز بن تیر

نگاه کرد و دو چشم مرا نشانه گرفت


امید عافیتم بود روزگار نخواست

قرار عیش و امان داشتم زمانه گرفت


زهی بخیل ستمگر که هر چه داد به من

به تیغ باز ستاند و به تازیانه گرفت


چو دود بی سر و سامان شدم که برق بلا

به خرمنم زد و آتش در آشیانه گرفت


چه جای گل که درخت کهن ز ریشه بسوخت

ازین سموم نفس کش که در جوانه گرفت


دل گرفته ی من همچو ابر بارانی

گشایشی مگر از گریه ی شبانه گرفت


The end of the Web?


The end of the Web?


Self-appointed computer ‘visionary’ David Gelernter has news for us — buzz buzz! — the end of the Web is coming! Well, not exactly, but there will be no ‘next’ browser or web protocol; instead, we’ll stop thinking spatially, in terms of ‘pages,’ and start thinking in a time-based manner, in terms of ‘streams.’ Presumably, our metaphors will change as well; we’ll no longer speak of “going to” or “visiting” internet resources; neither will we ‘surf’ or ‘browse’ or ‘explore.’ No, we’ll just swim in the stream, merge one stream with another, blend streams into a custom cappuccino of information, and search streams using exclusionary paradigms — his example is a stream which we tell to temporarily edit itself so that it displays only those moments that mention cranberries. We won’t use any of the old search language; instead we’ll dynamically edit constant real-time streams. We will, however, do a heck of a lot of “scrolling.”

But of course there’s just one problem with this: we won’t. The metaphors of information are, and have been, spatial ones, since the era of hieroglyphics and cuneiform. Our minds are, it seems, programmed for a sort of visual/spatial thinking — it goes back, doubtless, to our very old days as hunter/gatherers. Whereas time, that seemingly old friend of ours, is quite a recent invention, and an annoying one as well; until well into the modern era, with the invention of the bimetal strip, which led to reliable and affordable pocket-watches, no one, quite literally, knew ‘what time it was.’ Time, although it exists in our minds as a constant flow, is in fact made up of all kinds of disparate material that our conscious minds work to stitch together; it is a production, not an exterior condition. And, when it comes to the past, time gets murky; studies have shown that each time we recall past events, we alter our memory of them; it’s the reason eyewitness testimony is often unreliable. A “line” of time, unlike a horizon-line in an image, is very much a cultural construct.

Beyond that, we have some very suggestive empirical evidence that Internet users don’t like to interface with life this way. Facebook has tried this with their “timelines” and the result has been almost universal hatred. Gelernter points to blogs, and to Twitter, as time-stream paradigms, but in fact the vast majority of Tweets that have any lasting impact contain URL’s to more ‘static’ web resources. Blogs do indeed self-archive, and put the newest postings first, but people rarely search through these archives; if they come upon archived pages, it’s usually through lateral links such as those generated by a search engine. Who among us has read a blog from start to finish? Who would want to? But Gelernter goes even farther; he expects that everyone will be accessing everything through streams that constantly flow in real time. But do we want that either? The number of Facebook users who leave or quit, frustrated with the continual barrage of ‘news’ and ‘likes’ suggests that this paradigm isn’t going to be a crowd pleaser. And isn’t the current web founded on the pleasure of crowds, whence comes their (often unpaid) labor?

But the other reason that the spatially-metaphored web isn’t going to come to an end in favor of a time-metaphored one is that, to paraphrase Sun Ra, ‘it’s after the end of the Web.’ We already make time for our online doings, and whatever we do online becomes, if you want it to, part of a stream. Those who want to access it that way already have all kinds of software to do so; if you’d like to get real-time updates to all the blogs you follow as an RSS stream, you can do it. And more: if you want to think of the internet as a creature of time and flowing data, you already can think of it that way, model it that way, study it that way. But while you’re doing that, most of the people who are using it will be using it with spatial metaphors, and software to match.

This entry passed through the Full-Text RSS service - if this is your content and you're reading it on someone else's site, please read the FAQ at fivefilters.org/content-only/faq.php#publishers.

Take a Website Design Lesson from Leonardo Da Vinci


Leonardo Da Vinci

Take a Website Design Lesson from Leonardo Da Vinci

Five centuries later, simplicity is still the ultimate sophistication


As a website design company, we are often faced with complicated requests that require simple solutions.

With those requests comes a real temptation to data-dump. In the past, the web designer’s solution was to create a labyrinth of links and pages throughout the client’s site. But for us, that is a no-no.

We keep it simple.

We want to make the user experience as crisp and intuitive as possible.

That’s why when we have the option to create a maze of hyperlinks—we stop. We pause, and we take a few lessons from someone you may not associate with the internet, Renaissance master Leonardo Da Vinci.

Da Vinci is famously quoted as saying, “simplicity is the ultimate sophistication.” And while that may be true, it can be tricky to grasp just how simple he really meant.

For some extra insight on this, one of our American team members visited a Da Vinci exhibit at the U.S. Space & Rocket Museum in Huntsville, Alabama, which has temporarily replaced its’ space exploration theme in an homage to the 15th century inventor, sculptor and painter.

Here are some of our observations from the exhibit:

  1. Simplicity results in interaction—All throughout the museum, visitors were interacting with Da Vinci’s creations, but the longest queues were at simple, wooden machines that used only one or two moving parts to achieve their goal: cogs, pulleys or bearings. The result is not unlike new web designs that encourage users to scroll or swipe their way around a single, manageable page.
  2. Use open space to reduce clutter— Da Vinci once reimagined Milan in a model “ideal city.” He took the crowded, single story cityscape and tiered it into three wider, more open levels using canals for commerce. He then fitted every building with ventilation ducts. The message? Give people space and they will feel welcome.
  3. Beauty is in the details— Despite being incredibly simple, Da Vinci’s work was still highly detailed. Visitors to your site may never notice the subtle nuances of your typography or the extra 27 pixels between your body and the footer—just like they may never notice the small bridge and stream behind the Mona Lisa’s left shoulder. But those small details add to the piece in a big way.

Now, those are some great lessons; but you’re probably still wondering what a Renaissance exhibit is doing at a rocket science museum. And therein lies the final lesson: NASA credits Da Vinci’s machines with laying the ground-work for space exploration.

So in a very real way—simplicity took us to the Moon.

And if simplicity can take mankind to the Moon, what can it do for your company?

If you found value in this article, it would mean a lot to me if you hit the recommend button or share it!

This entry passed through the Full-Text RSS service - if this is your content and you're reading it on someone else's site, please read the FAQ at fivefilters.org/content-only/faq.php#publishers.

Stock photos that don’t suck


Stock photos that don’t suck

A list of places to find the best free stock photos


Finding great stock photos is a pain. You’re left with either low-res amateur photos, people wearing cheesy headsets, or photos that are out of budget for the project you’re working on. Below is an ongoing list (so bookmark it) of the best stock photo sites I’ve come across.


Know of any other great sites? Leave a note here and I’ll add it to the list.


This entry passed through the Full-Text RSS service - if this is your content and you're reading it on someone else's site, please read the FAQ at fivefilters.org/content-only/faq.php#publishers.

Contextual support is back, and it’s here to stay


Contextual support is back, and it’s here to stay

What it is, and why you should start using it


First up, what exactly is contextual support?

The term ‘contextual support’ itself lends the biggest hint, it’s being able to support your users proactively, where and when they are in most need of help.

con·tex·tu·al (kn-tksch-l, kn-)
adj.
Of, involving, or depending on a context.

Remember clippy, the office assistant in MS Office 97? That little dude everyone hated and became a cult classic due primarily to popping up at the most inappropriate of times.

Well, Clippy was the first experience of contextual support for hundreds of thousands of people, and it left a bad taste in their mouth from its poor execution. The general idea of clippy was to proactively provide tips and support for people when the system determined they were having trouble with a particular task (only he was a little too anxious).

But elevio, a new contextual support based startup is aiming to fix all this. I’ll get back to them later, but first…

What’s wrong with existing support systems?

Traditional support systems like Zendesk and Desk do a splendid job of providing systems to allow site owners to converse with their users when they run into troubles.

The trouble is, they are reactive systems. They rely on the user being patient enough to take the time to abandon what they were attempting and file a support ticket, and wait patiently for a reply which could (should) be super fast, but we’ve all been in the situation where we need to wait until the next morning or worse, Monday, for our support ticket to be replied to.

It’s been written about time and time again, that you more often than not only get one chance to win over a potential customer. If they don’t get your product, they’ll leave. If you’re relying on your customers taking the time to ask for your help, you’re doing it wrong.

Even directing the user to an FAQ or a knowledge-base isn’t going to smooth over rough seas with them. It’s like telling your user “yeah, we know our products hard to use, go over here and look around until you find the help you need”.

First of all, don’t make your user support themselves. Second, what if they don’t even know what to look for? They bail, that’s what.

Examples of contextual support services

Providers of contextual support are few and far between at the moment, as it’s still something that’s making its way back into the fore since the atrocity that was ‘clippy’, but the companies listed below cover the regrowth each with a different approach.

With each of the following services, they simply require a one off piece of code to be placed on your site or app, after that all content and messaging is managed via their own admin interfaces. Each charge a monthly fee.
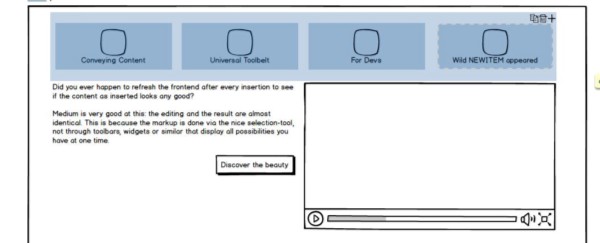
Elev.io

Elev.io is a new startup that provides contextual support to users of your site regardless of their status, they can be logged in users, or brand new general public users.

For example, a telephone company could create a tip with information including an image explaining where to find your account number on your latest bill, so when their customer is trying to login to their account using their account number, they can click on a little icon beside the input field, and the tip will be displayed for them.

They read the tip, close it, and fill in the form without losing focus or breaking stride. No external help was needed, no searching FAQs, no waiting for support staff to reply.

Over time, as collated user behaviour is monitored, insights can be seen on the admin panel letting you know where the pain points are for your users based on where they are opening tips most often, and which tips aren’t working based on user feedback. Using these insights, you know where you need to work in removing any road blocks.

Intercom.io

Intercom is a great service that allows site owners to provide proactive support, based on the data that you provide it on your users behaviour. You need to provide information on each user in order to be able to send them any type of message (alert, conversation or email), meaning this can’t be used with guests / public users, only logged in users of your site.

If a certain set of filters is met (that you define), an automated message can be sent to the user to either prompt them to complete some particular action, or ask them if they need a hand if they look stuck.

While it’s still somewhat reactive in it’s approach since it waits until the user has taken some action (or hasn’t taken action for a period days), it still leaves room for providing the answers a user needs, when they need them.

With the recent $23M Series B funding received by intercom.io, it’s evident that investors are prepared to bet that contextual support is an industry that’s here to stay.

Mixpanel In-app Notifications

The in-app notifications tool by MixPanel is another service that allows you to send in app messages to users of iPhone apps, based on how you segment the data you’re receiving from their usage.

The example they provide in their video is to provide tips to people on how to beat a certain level in a game if the user looks like they are spending way too long on it.

The in-app notifications tie into mixpanels main platform, so you can view reports based on the effectiveness of your in-app messages. Did users ignore them, or did they follow your advice and move forward? Did users who followed your advice power forward, or stop after that little push?

Should I be using contextual support?

It’s not a completely black and white answer. In its simplest form, if your website is very self explanatory then there’s probably no need to hand-hold your users.

However if there’s the potential for people to get stuck on hurdles, particularly in the vulnerable on-boarding stages, then contextual support can be a godsend.

Contextual support is dead, long live contextual support.


This article was also published on my blog, chrisduell.com

This entry passed through the Full-Text RSS service - if this is your content and you're reading it on someone else's site, please read the FAQ at fivefilters.org/content-only/faq.php#publishers.

Let’s get together and feel all right

داشتم تو iTunes موزیکا رو مرتب می‌کردم، یاد جوونی افتادم که سالها پیش جلوی یکی از کلیساهای فلورانس با هم یه کم حرف زدیم و سیگار دود کردیم. موزیسین خیابونی بود. می‌خواند و گیتار میزد.
اون زمانا اینا هنوز بودن. کنار خیابون ساز - اغلب - گیتار میزدن و از پولی که مردم بهشون میدادن هزینه سفرشونو تأمین میکردن
تو هر دستشدهتا دستبند کرده بود، تعداد نامعلومی انگشتر تو انگشتاش بود. از هر گوشش چهارتا گوشواره آویزون بود. لباسای رنگیپنگیو گشاد تنش بود، دمپاییانگشتی چرمی پاش بود، به سینهش و رو گیتارش علامت صلح چسبونده بود، موهاشو مثل باب‌ مارلی نمدی کرده بود، و تو جیباش موادی داشت که حمل و استفاده ازشون قانونا جرم محسوب میشد (ولی پاسبانای اون دورانم خیلیاشون خودشون مجرم بودن!)
خیلی جدی و پرحرارت (جوونا رو که دیدید چطورین؟) معتقد بود، تمام نگونبختی بشریت مال اینه که آدما به حرف باب مارلی درست توجه نکردهن که میخونه: «بیاین دورهمی احساس خوب کنیم!».

اتوبوس در ترافیک گیر کرده بود

و عقب اتوبوس چند دختر و پسر دبیرستانی که ظاهرا چند ساعت پیش از آن در امتحان تصدیق رانندگی قبول شده بودند با هیجان و تندتند با هم حرف میزدند و توی حرف هم میپریدند و از قهرمانی و هنرنمایی خود در پارک کردن، دندهعوض کردن، دورزدن و نیمکلاجحرف میزدند. صورتهای آنها از شادی میدرخشید. ‌
عجب! با خودم گفتم، هنوز این چیزها هست!؟ :)
و ناگهان یاد روز خوبی افتادم که تصدیقم را از اداره راهنمایی گرفته بودم، آن را توی جیب بغلم گذاشته بودم، و همینطور که شاد، سبک، سربلند و هیجان‌زده به سمت خانه میرفتم، هر چنددقیقه یکبار دستم را در جیبم میکردم که «نکند گم شده باشد!». 
اینطور شد که بین من و گروه پرسروصدای این پرندههایی که اتوبوس را پر از شادی کرده بودند پیوند دوستی نامرعی عمیقی به وجود آمد که دوسه ایستگاه ادامه داشت!
سهم شادی روزانه شما بزرگ و دلپذیر باد! اما این سهم امروز من بود، و امروز این جنس چنان نایاب شده، و شمار مشتریان قحطیزده آن چنان افزایشی داشته است که به اندازه یک دانهی ارزن از آن نیز غنیمت است. مثل آدم گمشده در کویر که وقتی جرعهای آب گلآلود به او تعارف میکنند، بهانه که نمیگیرد، هیچ، بلکه شکر میکند.

سرگردانی در دالانهای تاریک درونی به وقت 9 صبح یکشنبه ی خرداد

کتاب وادارم کرده بود یک نفس بخوانمش. انگار کن که دویده باشم. اگر صفحه 220 و خط قرمزی که تو زیر کلمه ها کشیده بودی نبود می رفتم تا آخر کتاب. با این همه کتاب مرا دوانده بود. آرامم نکرده بود. در لحن تند و یکنواخت نویسنده غرق شده بودم. اتفاقها فرصت خیال را از من گرفته بود. جمله ها دنبال هم کرده بودند و من ناظری بودم که مدام آدمهای روبرویم عوض می شدند. من اینجور قصه ها را دوست ندارم. دلم می خواهد راوی ام یک نفر باشد. بدانمش. بشناسمش. بلد باشمش. در کتاب دنبالش بگردم. تکه تکه هایش را بچینم کنار هم. هر فصل کاملترم کند. اما پراکندگی قصه ها اسیرم کرده بود. جذاب بود. جذاب و پر از کشش. اما لحن روایت راضیم نمی کرد. شخصیتها برایم آشنا نبودند. نمی توانستم حرکت بعدیشان را پیش بینی کنم. حسادتهای کوچک یا بزرگشان برایم قابل درک نبود.عشقهایشان ناشناس و نفهمیدنی بود. دنیایشان و شتابشان را دوست نداشتم. برای همین یک نفس آمده بودم تا صفحه 220 و رسیده بودم به خط قرمز تو و ایستاده بودم. کتاب را بستم و گذاشتم روی میز عسلی کوچک. فقط برای خاطر آن سه کلمه بود که نشستم به نوشتن. آن سه کلمه مرا از کتابی که در دستم بود و روزی که مقابلم بود پرت کرد به دنیای تو. دنیایی که مثل همان کلمه ها نمادش ابهام بود و ندانستن. دنیایی که با کلمه ها نمی شد تجربه اش کرد. کلمه ها فقط همه چیز را دشوارتر می کردند و حالا دنیایت روبروی من بود. با یک خط قرمز کوتاه. کتاب را بستم. آن کلمه ها را تجسم کردم. به چشمم راهرویی می آمد بی نور. با صدایی غریب از چکیدن قطره های آب. با همهمه مبهم کسانی که نمی شناسم و کلماتشان برایم مفهوم نیست. راهی که نمی دانستم فروترم می برد یا به نور می رساندم. چشمهایم را باز کردم و ترسیده بودم. با این همه خودم را درک می کردم. خودم را که این همه غریبگی را در سه کلمه باز شناخته بود. خودم را که از دوست داشتن کسی که زیر کلمه های ترسناک خط می کشید نمی ترسیدم. خودم را که انگار روزنه ای برایم باز شده بود به آن ابهام همیشگی.

کتاب با در نسیمی که از پنجره می آمد تکان می خورد. جایی داشتند چکشی را می کوبیدند به صفحه ای. جرثقیل باز داشت درخت خشکی را که ریشه کن کرده بود روبرویم می چرخاند. بوی غذا می آمد و صدای ماشین و من به اندازه سه کلمه از دیروزم به تو نزدیکتر بودم. به اندازه سه کلمه کوچک و ترسناک. 


* کتاب اتفاق / گلی ترقی / نشر نیلوفر.

Reverse port forwarding


Reverse port forwarding

Accessing your local development server from the outside world.


It’s often the case that you have a local development server that you wish you could access over the interwebs. Perhaps you need to do a demo, show a prototype to a colleague, or integrate with external servers that can’t connect directly to your laptop.

In the past I’ve gone through a laborious hack→build→push→run→test cycle that is slow and inefficient.

Enter reverse port forwarding, the age old technique of SSH Tunneling.

All you need is access to a remote server that can be accessed from the outside world, such as an EC2 instance or a VPS.


First off, log in to your remote server and open /etc/ssh/sshd_config. If it does not already exist add the line:

GatewayPorts clientspecified

Then restart the SSH daemon:

sudo /etc/init.d/ssh restart
# or
sudo service sshd restart

Back on your laptop, start your development server and then in another terminal run the following:

ssh -N -R :3000:localhost:4000 user@12.34.56.78

This will forward requests to port 3000 on your remote server to port 4000 on your laptop. Visiting http://12.34.56.78:3000 will be handled by your laptop.

(Substitute ports and IP addresses as appropriate.)


That’s it.

This entry passed through the Full-Text RSS service - if this is your content and you're reading it on someone else's site, please read the FAQ at fivefilters.org/content-only/faq.php#publishers.

The Pursuit of Hapi-ness


The Pursuit of Hapi-ness

An introduction to Hapi 6.0


“The Pursuit of Hapi-ness: An Introduction to Hapi 3.0” — Winner of the Getting Started Tutorial Contest for Hapi!

Hapi is a configuration-centric HTTP framework developed by Walmart Labs for Node.js, powering their backend mobile platform. It’s gained a lot of traction in the community recently with more and more companies starting to make use of it, such as PayPal, Beats Audio and Mozilla.

In this tutorial, we’ll cover the essentials of the following topics:

  • Initialising a Hapi application
  • Basic routing
  • Data validation
  • Server method caching
  • Views and static assets
  • Server and request-level logging
  • The plugin architecture
  • Managing multiple servers with packs
  • Composing servers entirely from a configuration object
  • Launching servers from a configuration using the Hapi executable
  • Testing services using Lab (a separate tutorial)

Initialising The Application

The first thing we’ll do is initialise our new Hapi application, entitled “MyApp” in this case.

bash-3.2$ mkdir MyApp
bash-3.2$ cd MyApp/
bash-3.2$ npm init
name: (MyApp)
version: (0.0.0) 0.0.1
description: An example Hapi application
entry point: (index.js)
test command: mocha
git repository:
keywords:
author: Fionn Kelleher <me@fionn.co>
license: (ISC) BSD
About to write to /Users/fionnkelleher/MyApp/package.json:
{
"name": "MyApp",
"version": "0.0.1",
"description": "An example Hapi application",
"main": "index.js",
"scripts": {
"test": "mocha"
},
"author": "Fionn Kelleher <me@fionn.co>",
"license": "BSD"
}

Is this ok? (yes)

npm init generates a package.json file in the current directory based on inputted options.

With this completed, we can install Hapi as a dependency of MyApp.

bash-3.2$ npm install hapi@6.x —-save
npm WARN package.json MyApp@0.0.1 No repository field.
npm WARN package.json MyApp@0.0.1 No README data
npm http GET https://registry.npmjs.org/hapi
npm http 200 https://registry.npmjs.org/hapi
npm http GET https://registry.npmjs.org/hapi/-/hapi-6.0.0.tgz
npm http 200 https://registry.npmjs.org/hapi/-/hapi-6.0.0.tgz
[...]
hapi@6.0.0 node_modules/hapi
bash-3.2$

Hapi will be installed in the node_modules directory, as well as being added to the dependencies field of the package.json file we generated earlier, allowing for easy installation of our packaged application in production via a simple npm install.


Creating Our Server

To kick things off, we need to create a Hapi server and bind it to a host and port. Create an index.js with the following:

var Hapi = require("hapi");
var server = new Hapi.Server(8080, "localhost");
server.start(function() {
console.log("Hapi server started @", server.info.uri);
});

First, we require the main Hapi module. We create a new Hapi.Server object set to listen on port 8080 on “localhost”, and assign it to the server variable.

The Hapi.Server object contains many useful methods to configure the server, which we’ll delve into shortly. One of these is the “start” method, which makes the server listen on the port and host specified when creating it. It accepts a callback that gets executed when the server has started to listen for requests.

Execute index.js via node, and we’ll be greeted with Hapi server started @ http://localhost:8080 if all went well. Using our web browser—or a command line utility such as cURL—send a request to the Hapi server. Straight away, we’re greeted with the following JSON object.

{"statusCode":404,"error":"Not Found"}

Since we haven’t added any routes yet, there are no resources that can be accessed through the server.


Routing

Routing allows the server to react differently based on the HTTP path requested and method used. Hapi exposes routing at the highest level, without tangled, complex regular expressions.

To add a route to the server’s routing table, we use the route method, which requires an object containing the path, method and handler keys at a minimum. Here’s a quick usage example; add this to index.js before server.start() is called.

server.route({
path: "/",
method: "GET",
handler: function(request, reply) {
reply("Hello, world!");
}
});

path

Hapi allows us to define routes to match HTTP paths that are in compliance with the RFC 3986 specification. In addition, Hapi’s router provides parameterized paths, allowing us to extract segments of a path.

Here are some examples of valid values for the path key in the route object.

method

The method key of the route object defines what HTTP method that route deals with, be it GET, POST, PUT, DELETE or PATCH. The method can also be specified as an asterisk (*), signifying that the route will match any method.

handler

The handler key is an object or function that specifies the action to be taken when a request matches the route. More often than not, the handler will be a function with the signature function(request, reply) {…}.

The first parameter passed to the handler is a Hapi request object. To quote Hapi’s reference on the request object:

The request object is created internally for each incoming request. It is not the node request object received from the HTTP server callback (which is available in request.raw.req). The request object methods and properties change through the request lifecycle.

The request object allows us to access path parameters and query string components amongst other details.

The reply interface allows us to send a reply to the client. When called as a function, reply can take any of the following:

  • A String.
  • A JavaScript Object/Array (which will be JSON.stringify’d).
  • A Buffer.
  • A ReadableStream.

Putting It All Together

Add a route definition as follows before our server is started.

server.route({
path: "/hello/{name*2}",
method: "GET",
handler: function(request, reply) {
var names = request.params.name.split("/");
reply({
first: names[0],
last: names[1],
mood: request.query.mood || "neutral"
});
}
});

Send a request to http://localhost:8080/hello/John/Doe and we’ll be returned the following JSON object.

{"first":"John","last":"Doe":"mood":"neutral"}

Send a request to http://localhost:8080/hello/Jinny/Doe?mood=happy, and we’ll be returned the following JSON object.

{"first":"Jinny","last":"Doe","mood":"happy"}

Validation

It’s often desirable to validate data passed to the route, especially so whilst building an API. Hapi makes this a breeze by using the Joi object schema validation module, also developed by Spumko.

First, let’s use npm to install the Joi module and save it to our project’s dependencies.

bash-3.2$ npm install joi@4.x --save
npm WARN package.json MyApp@0.0.1 No repository field.
npm WARN package.json MyApp@0.0.1 No README data
npm http GET https://registry.npmjs.org/joi
npm http 304 https://registry.npmjs.org/joi
npm http GET https://registry.npmjs.org/hoek
npm http 304 https://registry.npmjs.org/hoek
joi@4.6.0 node_modules/joi
└── hoek@2.2.0

To begin using Joi validation, we need to require the module. Add the following line after we require Hapi.

var Joi = require("joi");

We use the config key in the route object to express validation rules. The config key is an object that allows us to split the route information from its implementation, and allows the definition of validation rules, cache settings and more.

Let’s define our route configuration.

var helloConfig = {
handler: function(request, reply) {
var names = request.params.name.split("/");
reply({
first: names[0],
last: names[1],
mood: request.query.mood
});
},
validate: {
params: {
name: Joi.string().min(8).max(100)
},
query: {
mood: Joi.string().valid(["neutral","happy","sad"]).default("neutral")
}
}
};

The object now contains the handler — which can either be a part of the config object or the route object — and Joi schemas.

The validate key can be used to define schemas matching against:

  • query — query string components
  • payload — the request body
  • params — parameterized path segments

In this case, our configuration says the following:

  • The name segment of the path must be at least eight characters long, and at maximum, 100 characters long.
  • The mood query string component is only valid if it’s value is either “neutral”, “happy” or “sad”. If the component is omitted from the request, Joi will set it to “neutral”, freeing us from doing this in our handler.

Our modified route is as follows:

server.route({
path: "/hello/{name*2}",
method: "GET",
config: helloConfig
});

Restart the Hapi server and make a request to http://localhost:8080/hello/J/Doe and we will be presented with the following object, containing a human-readable explanation as to why the request is not valid.

{"statusCode":400,"error":"Bad Request","message":"the length of name must be at least 8 characters long","validation":{"source":"path","keys":["name"]}}

If we request http://localhost:8080/hello/John/Doe we will get the same JSON object as we got before.

{"first":"John","last":"Doe":"mood":"neutral"}

Let’s set the mood to “excited”, and see what response we get. Make a request to http://localhost:8080/hello/John/Doe?mood=excited.

{"statusCode":400,"error":"Bad Request","message":"the value of mood must be one of neutral, happy, sad","validation":{"source":"query","keys":["mood"]}}

Again, Hapi sends us a concise error message specifying both a human-readable error message and the specific area that Joi reported wasn’t valid.

Let’s go one step further and add a query parameter for the person’s age. Modify the route’s configuration to the following (we’re adding the age key to the response, and a validation rule for Joi).

var helloConfig = {
handler: function(request, reply) {
var names = request.params.name.split("/");
reply({
first: names[0],
last: names[1],
mood: request.query.mood,
age: request.query.age
});
},
validate: {
params: {
name: Joi.string().min(8).max(20)
},
query: {
mood: Joi.string().valid(["neutral","happy","sad"]).default("neutral"),
age: Joi.number().integer().min(13).max(100)
}
}
};

When we request http://localhost:8080/hello/John/Doe?age=19 we’ll be sent the following JSON object:

{"first":"John","last":"Doe","mood":"neutral","age":19}

Notice that “age” gets converted to a Number automatically by Joi before being assigned to request.query. If we attempt to specify age as something other than an integer, such as a string or floating point number, the validation won’t pass.

For example, if we request http://localhost:8080/hello/John/Doe?age=no we’ll get a Joi error.

{"statusCode":400,"error":"Bad Request","message":"the value of age must be a number","validation":{"source":"query","keys":["age"]}}

Joi provides a lot of neat validation functions, which you can find out about on its GitHub repository.


Caching

Caching is also straightforward. Hapi utilises yet another module of Spumko’s, catbox, to abstract cache backends. At the time of writing, catbox caching supports a limited in-memory cache (used by default), Redis, MongoDB, Memcached and Riak.

To set up caching with our Hapi server, we’ll pass a server configuration object to the constructor containing our catbox configuration. In this tutorial, we’ll use a simple Redis cache, but you can find information on catbox engines over here.

Install catbox-redis and add it to our dependencies via npm. The creation of our Server object now looks like the following:

var server = new Hapi.Server(8080, "localhost", {
cache: {
engine: require("catbox-redis"),
options: {
host: "localhost",
partition: "MyApp",
password: "mypassword"
}
}
}
);

Server Methods

Server methods allow us to assign a commonly used utility function to the Server instance.

Let’s create a method to return a random colour from an array.

server.method("getColour", function(next) {
var colours = ["red", "blue", "indigo", "violet", "green"];
var colour = colours[Math.floor(Math.random() * colours.length)];
next(null, colour);
});

We can use this in our route handler as follows.

function(request, reply) {
var names = request.params.name.split("/");
server.methods.getColour(function(err, colour) {
reply({
first: names[0],
last: names[1],
mood: request.query.mood,
age: request.query.age,
colour: colour
});
});
}

Each time we make a valid request, the colour is randomly selected from the array and sent back to the client. But what if we wanted to generate the colour based on the name, and cache it for future requests?

As with most parts of Hapi, we can pass a configuration object to server.method(). Using the method configuration object, we can easily set up caching rules.

Let’s modify the method to also take a name as a parameter, and an options object specifying how long the colour matching the name should be cached for.

server.method("getColour", function(name, next) {
var colours = ["red", "blue", "indigo", "violet", "green"];
var colour = colours[Math.floor(Math.random() * colours.length)];
next(null, colour);
}, {
cache: {
expiresIn: 30000,
}
}
);

We also need to modify our route handler to pass in the name, as follows.

function(request, reply) {
var names = request.params.name.split("/");
server.methods.getColour(request.params.name, function(err, colour) {
reply({
first: names[0],
last: names[1],
mood: request.query.mood,
age: request.query.age,
colour: colour
});
});
}

Now, if we make a request to our /hello/{name*2} route, Hapi will first consult the cache to check if the name has a colour already cached for it. If it doesn’t, the server method’s function will be called, and the outcome will be cached for 30 seconds.

Restart the server and make a request to http://localhost:8080/hello/John/Doe. In my case, the result is the following:

{"first":"John","last":"Doe","mood":"neutral","age":53,"colour":"blue"}

Any subsequent requests with the name “John Doe” — for up to 30 seconds — will yield “blue” as the colour.


Views and Static Assets

We’ve been dealing solely with JSON-serialised data throughout this guide. Let’s bring some simple HTML views into the mix.

Hapi supports view rendering out of the box with any template engine. Jade seems very popular, so let’s use Jade to render our views. Install Jade via npm and create a directory, views. In the Server configuration object, add the following.

views: {
engines: {
jade: require("jade")
},
path: "./views"
}

This tells Hapi to render templates with the “.jade” extension using the jade module, and to look for views in “./views”. In the views directory, create a new file named “hello.jade” with the following contents.

doctype html
html
head
title Hello, #{first} #{last}!
link(rel="stylesheet", href="//netdna.bootstrapcdn.com/bootstrap/3.1.1/css/bootstrap.min.css")
body
div.container
h1 Hey there, #{first}!
p.
According to my data, your name is #{first} #{last}.
You're #{age || "unknown"} years old, and I predict you're fond of the
colour #{colour}... Correct? At the moment you appear to
be #{mood}.
p That's all I know...

Modify the route handler to call the view rendering method of the reply interface.

reply.view("hello", {
first: names[0],
last: names[1],
mood: request.query.mood,
age: request.query.age,
colour: colour
});

Now, if we send a valid request to the route, we’ll get a view that looks like this.

We can also use Hapi to serve static assets. Create a new directory, public, and a sub-directory images.

First of all, we need to add a new route for “/static/{path*}”.

server.route({
path: "/static/{path*}",
method: "GET",
handler: {
directory: {
path: "./public",
listing: false,
index: false
}
}
});

This time around, our route’s handler is another configuration object rather than a function. The handler is specifying to serve a directory with the following options:

  • Resolve request.params.path relative to the ./public directory.
  • Disable directory listings.
  • Disable the serving of files beginning with index.html.

In the images directory, add an image for each valid mood — that’s “neutral”, ‘happy” and “sad”. For this tutorial, we’ll just stick to PNGs.

Update our “hello.jade” template to the following:

doctype html
html
head
title Hello, #{first} #{last}!
link(rel="stylesheet", href="//netdna.bootstrapcdn.com/bootstrap/3.1.1/css/bootstrap.min.css")
body
div.container
h1 Hey there, #{first}!
p.
According to my data, your name is #{first} #{last}.
You're #{age || "unknown"} years old, and I predict you're fond of the
colour #{colour}... Correct? At the moment you appear to
be...
img(src="/static/images/#{mood}.png", width=200)
p That's all I know...

We now get a different image based on the mood.


Logging

Hapi logging is expressive and easy to use. Hapi.Server inherits from EventEmitter, and provides the following log consumption events.

  • log — events logged using the log method of the server.
  • request — events logged using the log method of a request object.

Tags

Throughout Hapi, we’ll come across tags. When logging with Hapi, tags allow us to easily deal with a particular type of event and differentiate between them. Tags are the only required identifier — log messages are entirely optional.

Logging Server-Related Events

Hapi.Server exposes a log method that takes the following parameters.

  • tags — array of tags used to identify the event.
  • data — an optional argument allowing us to pass a message or object along with the log.
  • timestamp — an optional timestamp associated with the log entry, expressed in milliseconds.

Hapi logs various internal events using this method. Here are some examples.

server.log(["test"], "This is my log entry!");
server.log(["error"], "Bogus data received from cache, unable to proceed.");

To consume these events, we will add a listener to the server for “log”.

server.on("log", function(event, tags) {
var tagsJoined = Object.keys(tags).join();
var message = event.data;
console.log("Log entry [" + tagsJoined + "] (" + (message || "") + ")");
});

Logging Request-Related Events

It’s also simple to associate logs with a particular request.

Let’s add a new route, and when we request it, it will invoke the log method of the request object.

server.route({
path: "/log/{data}",
method: "GET",
handler: function(request, reply) {
request.log(["pathData"]);
reply("Logged " + request.params.data);
}
});

To consume request-level logs, we can listen for the “request” event on our Hapi.Server instance, similarly to how we logged server-related events. In addition to the “event” and “tags” arguments, we also get access to the request object as the first parameter.

server.on("request", function(request, event, tags) {
if (tags.pathData) {
console.log("Logging pathData: " + request.params.data);
}
});

When we’re only interested in logging the acknowledgement of a request to the console, we can add a debug object to the server’s configuration (passed to the Hapi.Server constructor) that looks like the following.

debug: {
request: ["received"]
}

We’ll start to see data logged to stdout each time someone sends a request.

Debug: hapi, received 
{"id":"1394926567679-33146-48432","method":"get","url":"/","agent":"Mozilla/5.0 (Macintosh; Intel Mac OS X 10_9_0) AppleWebKit/537.36 (KHTML, like Gecko) Chrome/35.0.1864.0 Safari/537.36"}

Plugins

Having every route and server configuration in one script can get unwieldy pretty quickly. Fortunately, Hapi provides a plugin interface that can be used to split our project up into logical components, or to quickly hook new functionality into our Hapi server from npm.

Before diving into plugin architecture, we need to understand that Hapi provides an interface for grouping servers together, called a “pack”. Every Hapi.Server belongs to a Hapi.Pack, regardless of whether or not it was explicitly added to one or not. We’ll explain this concept later on; for now, you only need to know that the plugin interface is built atop the pack interface.

For example, we can easily activate the “lout” plugin — developed by Spumko — to provide a “/docs” route, displaying the server’s routing table as a set of endpoints. Use npm to install lout, and replace the server.start() call with the following.

var lout = require("lout");

server.pack.register({plugin: lout}, function(err) {
if (err) throw err;
server.start(function() {
console.log("Hapi server started @ " + server.info.uri);
});
});

Navigate to http://localhost:8080/docs and we’ll receive a list of routes we have configured as well as the HTTP method they use. This functionality is added by lout — if you want to see configurable options, visit the GitHub repository.

Creating a Plugin

Plugins are regular modules that export a register function, called when the plugin is registered to a pack. Plugins can live in node_modules or any other directory resolvable by Node’s module system. npm modules can be required using just the name of the plugin (which we did with lout above), other modules need to be specified relative to the working directory of the server.

Create a “plugins” directory, and create a sub-directory named “example”. In this directory, run “npm init” as we did when we started the MyApp project.

bash-3.2$ mkdir -p plugins/example
bash-3.2$ cd plugins/example/
bash-3.2$ npm init
name: (example)
version: (0.0.0) 0.0.1
description: Example Hapi plugin
entry point: (index.js)
test command:
git repository:
keywords:
author: Fionn Kelleher <me@fionn.co>
license: (ISC) BSD
About to write to /Users/fionnkelleher/MyApp/plugins/example/package.json:

{
"name": "example",
"version": "0.0.1",
"description": "Example Hapi plugin",
"main": "index.js",
"scripts": {
"test": "echo "Error: no test specified" && exit 1"
},
"author": "Fionn Kelleher <me@fionn.co>",
"license": "BSD"
}

Is this ok? (yes)

In the directory, create index.js with the following contents.

exports.register = function(plugin, options, next) {
next();
};

exports.register.attributes = {
pkg: require("./package.json")
}

We’re exporting a register function that will be called as soon as the plugin has been required. It has the signature function(plugin, options, next) {…}.

The register function is the most important part, as it provides a means of configuring the plugin. To explain the arguments the function takes:

  • plugin — the plugin interface that we utilise to define routes, methods and more that are associated with the plugin.
  • options — an object containing any options passed when requiring the plugin.
  • next — a function that is required to be called when the plugin is considered to be in a usable state.

Let’s expand our barebones plugin to define a route.

Our plugin will now resemble the following:

exports.register = function(plugin, options, next) {
plugin.route({
path: "/my/plugin",
method: "GET",
handler: function(request, reply) {
reply("This is a reply from a route defined in my plugin!");
}
});
next();
};

exports.register.attributes = {
pkg: require("./package.json")
};

Modify MyApp’s index.js to require the plugin and register it.

server.pack.register([
{ plugin: require("lout") },
{ plugin: require("./plugins/example") }
]
, function(err) {
if (err) throw err;
server.start(function() {
console.log("Hapi server started @ " + server.info.uri);
});
});

Restart the server and send a request to http://localhost:8080/my/plugin and we’ll be greeted with “This is a reply from a route defined in my plugin!”.

Passing Configuration To Plugins

It’s possible to pass a configuration object to your plugins, for example if we were wishing to make the route’s path configurable, we could modify our plugin to the following:

var Hoek = require("hoek");
var defaults = {
route: "/my/plugin"
};
exports.register = function(plugin, options, next) {
options = Hoek.applyToDefaults(defaults, options);

plugin.route({
path: options.route,
method: "GET",
handler: function(request, reply) {
reply("This is a reply from a route defined in my plugin!");
}
});
next();
};

exports.register.attributes {
pkg: require("./package.json")
};

Make sure you have the Hoek module installed as a dependency. Hoek is a utility library developed by Spumko, and includes an easy method to apply user configured options to an object of default values.

When we modify index.js to the following, the route will be changed to “/my/custom/route”.

server.pack.register([
{ plugin: require("lout") },
{
plugin: require("./plugins/example"),
options: { route: "/my/custom/route" }
}
], function(err) {
if (err) throw err;
server.start(function() {
console.log("Hapi server started @ " + server.info.uri);
});
});

Packs

We talked briefly about packs in the plugins section; we’re now going to look into them in a little more depth.

Hapi.Pack objects represent a group of servers, usually grouped in a logical manner. Packs allow us to easily share functionality between independent servers, as well as start and stop them with little effort. Each instance of Hapi.Server holds a reference to a pack. When we created the server for MyApp, a pack was automatically created for us and assigned to the “pack” property of the server.

More often than not though, packs are created explicitly as so:

var pack = new Hapi.Pack();

Packs implement methods to start and stop it, as well as the plugin interface we explored in the Plugins section earlier. They also allow us to create a new instance of Hapi.Server and assign it using the server method.

var s1 = pack.server(8080, "localhost");
s1.route({
path: "/server/{id}",
method: "GET",
handler: function(request, reply) {
reply(request.params.id);
}
});
var s2 = pack.server(8081, "localhost");
pack.register([
{ plugin: require("lout") },
{ plugin: require("./plugins/example") }
], function(err) {
if (err) throw err;
pack.start(function(server) {
console.log("Hapi pack started.");
});
});

We’re also assigning labels to the two servers — these are conceptually similar to tags.

Since our pack has the lout plugin loaded, we can request either http://localhost:8080/docs or http://localhost:8081/docs and get a nice view of each server’s routing table. You’ll notice that both servers also have the route provided by the plugin we created earlier, however, only the first server has the “/server/{id}” route.


Composing Packs

Packs of Hapi servers can be created using the “.compose()” method of Hapi.Pack. This allows us to use a configuration object to define each server’s attributes as well as what plugins to load.

The pack we created above could be written as the following:

var manifest = {
servers: [
{ port: 8080 },
{ port: 8081 }
],
plugins: {
"lout": {}
"./plugins/example": {
route: "/my/custom/route"
}
}
}
Hapi.Pack.compose(manifest, function(err, pack) {
pack.start(function() {
console.log("Servers started");
});
});

(Note: There appears to be a tiny bug in resolving relative plugins using Composer. To make this example run, you need to remove “./plugins/example” from the plugins array in our manifest.)

A rundown:

  • First we create a manifest object, specifying the configuration of our pack.
  • We call the compose method of Hapi.Pack to create the pack and any require our plugins.
  • The pack is then started.

Using the Hapi Executable

Although Hapi servers can be written entirely in JavaScript, Hapi provides an executable that allows you to compose and launch packs of servers from a JSON configuration identical to what we used before. This is useful for when your Hapi servers are split up into plugins.

First, create a JSON configuration in the root of MyApp named “manifest.json”, containing the following:

{
"servers": [
{
"port": 8080
},
{
"port": 8081
}
],
"plugins": {
"lout": {},
"./plugins/example": {
"route": "/my/custom/route"
}
}
}

To start our servers we can now execute “./node_modules/hapi/bin/hapi -c manifest.json” and our servers will be composed and started.

Environmentally Dependent Configuration

Configuration gets loaded via Confidence, a configuration document format interoperable with normal JSON. Confidence provides a few useful features to deal with configurations; one of which is the ability to modify the configuration at runtime based on other values either present in the configuration itself, or environmental variables. These are called filters.

To learn about Confidence, I recommend taking a read of Vawks Clamantis’ “Configuration with Confidence”, which you can find over here.

Unit Testing

For sake of brevity in this tutorial, I’ve created a whole new tutorial on unit testing Hapi servers. You can find it over here.


This getting started guide is only the tip of the iceberg for Hapi. Hapi is a pretty large framework, bundling a lot of functionality into an easy to use API. If you’re interested in diving in deeper, the reference is always a good place to start. Eran Hammer (hueniverse) has also done a recent presentation to &yet on Hapi 2.0, which can be found here. Since Hapi’s brisk development cycle results in frequent backwards-incompatible changes, it’s worth keeping up-to-date with the reference to make sure that if your app was built based on an older version of Hapi, it’s updated accordingly to mitigate any potential issues.

This entry passed through the Full-Text RSS service - if this is your content and you're reading it on someone else's site, please read the FAQ at fivefilters.org/content-only/faq.php#publishers.

It’s OK To Not Know


It’s OK To Not Know

Or how to stay sane at a new job


I’m a work vagabond. Over the course of six years, I tried six different jobs and now I’m at my seventh halt. This is one thing I've learnt from all these different experiences.

1. Keep calm and do your research

You can’t know everything about the new job. But you can (and probably should) try to get there. No matter what it is, don’t expect someone to hand all the information on the plate and be unbiased about it.

2. Ask for help

People tend to fear coming off as incompetent or even lazy, but asking for help makes you deal with struggles faster. Don’t just limit yourself to the people you work with. Ask advice from everyone you know (and don’t know) who are able to give some worthy piece of mind.

3. Speak your mind

Speaking your mind is good for two reasons: you get to be right; and you get to be wrong. If you’re right, you earn credibility. If you’re wrong, you will be corrected and you will be right the next time. It’s OK to hit and miss, as long as you learn from your actions.


Read the full article on Despreneur and please share your own experiences with me!

This entry passed through the Full-Text RSS service - if this is your content and you're reading it on someone else's site, please read the FAQ at fivefilters.org/content-only/faq.php#publishers.

It’s 2014 — where is my backendless CMS?


It’s 2014 — where is my backendless CMS?

Please stop the madness


Wordpress, TYPO3, and all other great CMS have a huge backend to give you the opportunity to change every last bit of your website to your needs.

As a frontenddev who regularely works with a lot of content to digest, reorganize and publish for clients or other projects, I still struggle with the decision of a decent system that deals with the important background stuff (accounts, API, revision, newsletter, blog, security) and leaves all the frontend freedom to me.

Sometimes I wonder why I even bother to use a CMS anymore. When clients refuse to learn about editing content in the CMS of choice, or do not care about content that much nevertheless. Organizing content site-by-site, content area for content area is not only exhausting, but also a very unproductive way to get things done.

A valid reason for this could be, that we expect our CMS to do anything for us.

Should we either use a mediocre solution for everything or a good solution for one thing at a time? Most clients are happy with a blog/page mix. If we want more, we need to look for plugins, addons or widgets. Or even worse: use another service that we can hopefully adapt to the same style as the current mainwebsite has. So if our client needs a shop, maybe a newsletter opt-in, throw in another contact form, we soon have a clutter of shopify, mailchimp and other third-party software. Well done. This is not the way.

The Dream — a new concept to organize content in the way we love to.

Did you ever happen to hit refresh on the frontend after every insertion to see, if the content as inserted looks any good? Medium is very good at this: the editing and the result are almost identical. This is because the markup is done via the nice selection-tool and some on-hover icons to add embeds/images. Medium does this not via toolbars, widgets or similar that display all possibilities you have at one time.

If we strip our toolbelt down to something more simple, we can create something thats easy to use but powerful.

A few mockups later

If I were going to create a CMS, this is how I would begin to plan it.

Created with Balsamiq Mockups — their software is awesome!

Core principles:
Layout
, Module and Content editing.

The possibly most impressive editing tool to demonstrate, would be the modules.

The underlying idea of this, is that modules can have as many content areas as you need. You build them with HTML via your templating engine of choice (Smarty, Twig or Fluid maybe) where you set content areas that can be edited in the frontend. What kind of media it contains (text, images, date, etc) and where they get displayed in the markup.

Example of a bootstrap slider implementation

There is a CMS called Fireball, it’s developed to live on top of the Woltlab Community Framework. It makes use of the concept of having modules you can repeatedly use all over the website. See Example.

The light blue area is a rows-module that is selected. You can move it around via drag and drop, add another row via the + in the upper right corner, delete and of course also copy it.

How awesome would it be to add new rows at the click of a button?

Want to copy it to another page? We know how to copy on our desktop environments with the help of our keyboard, I could think about something similar: select the module, press ctrl and then drag it to the desired navigation item, and it would presumably land in the first available main content area. Want a cross reference where both items stay the same when you edit just one? ctrl+shift+drag it somewhere. It works so nicely in windows or other Desktop UIs, why not use the same idea for the web? It’s not only easy, on top of that — it would be intuitive to move around and add new stuff. I am not quite sure if I should make use of a selfmade context menu.

This Frontend/Backend-in-one solution would be javascript-heavy. At least for the editing.

Some predefined modules:

Rows, Page Navigation, Breadcrumbs, Language Selector, Article with or without Comment section, Slider, etc etc.

You could even restrict some modules to some parent-modules. There is no use for lists in tables and vice versa.

Content Editing as we know it

Not much to say on this one: There is already a library for a medium.com similar editor: https://github.com/daviferreira/medium-editor.

Layout

Usually, this is the first thing you do when you are done with the content: you decide which content goes where. The only thing I can think of is that you can set which parts repeat across other pages. Like navigation, header together with logo + slogan and subscription opt-in. The main content area could have an element that is always present in the same layout.

By now, we have covered all aspects of professional flexible templates:

We have a layout, partials and the actual content. We can easily change it to our needs.

TYPO3 Fluid is awesome in the way it organizes the layout:

Conclusion

There are still a few points open. For example: how to deal with hidden navigation items. Overall, I would really love to use something that is this easy to modify and expand. I always struggled with the existing Systems to add my custom stuff in a quick manner, without polluting RTF editors with my HTML, which is not well editable for clients. Another issue is, that making a CMS this easy to use, would perhaps empower our clients to fuck the whole website up very easily.

We also havn’t covered how we would set different sizes on rows — for now it’s only even sized container.

Please let me know what you think about it, and if you either believe that this idea has a future or not.

Kudos

This article is a created as a response to @nobackend ( http://nobackend.org/ )

[embedded content]
https://twitter.com/martinmuzatko/statuses/469436290765975553
[embedded content]
https://twitter.com/noBackend/statuses/469436783626039296

Further Read

I recommend this one: Brad Frost on Modular Frontend: http://bradfrostweb.com/blog/post/atomic-web-design/

This entry passed through the Full-Text RSS service - if this is your content and you're reading it on someone else's site, please read the FAQ at fivefilters.org/content-only/faq.php#publishers.